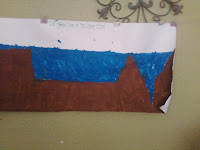


Elizabeth and I made a drawing of a diagram of what the ocean floor looks like. I had found the detailed instructions to draw one (let me know if you need the directions) and then she and I painted it with tempera paint. The next morning, we added labels such as continental shelf, shoreline, plain and trench. (The goal for me is not that the girls memorize all these features, but that they are introduced to them and introduced to the idea that the ocean floor is not a flat surface. Eventually I am sure we will come back to oceans and I want the seeds of knowledge to be there.)
SAND MODELING DOUGH: (textured play doh!)
1 cup sand
1/2 cup cornstarch
1 teaspoon Alum
3/4 cup hot water
food coloring if desired
Mix sand, cornstarch and Alum in bowl. Add hot water and stir vigorously. Add food coloring if desired. Cook over medium heat until thick. Let dough cool. Mold into desired shapes and let dry in the sun for several days. Store any leftover dough in an airtight container in the refrigerator.
Then we used this recipe to make sand modeling dough to make our own ocean floors. I will get some pictures up of the finished product, but they are still drying. The directions for the floors says to have the children make diagrams of the ocean floor and label the features. We did not go quite that far (especially as the activitiy is for 2nd graders). But the girls had a wonderful time creating sea features for their ocean floor like coral beds, tunnels, starfish etc.
It always amazes me how much kids can rise up to the expectation set for them.
Chapter One
16 years ago


0 comments:
Post a Comment